How to Reduce Risk Across the Product Development Lifecycle: from Strategic Prototyping to Design for Manufacturing and Beyond
All About that Process
What does it take to turn an idea into a prototype and a prototype into a finished product? Whether it’s an endoscopic surgical tool, wearable device with accompanying app, or personnel tracker for First Responders or the military, success always comes down to the process, no matter the scale. When we talk to entrepreneurs, small-businesses, or manufacturers exploring how to bring a new product to market, they always share their concern about spending a lot of money and not getting the outcome they (or their customers) need. They struggle with the frustration of choosing which idea is worth the investment or become overwhelmed and not know where to begin. Sound familiar? At Root3 Labs, we pair the product development process with specialized engineering know-how to quickly map the path to success, regardless of the application. So, let’s get started with understanding the Product Development Process and see how to increase the odds of success while reducing risk along the way.
First Things First
First, we need to understand that each product life cycle has two core components to be successful: Technical and Business. Keeping these two components in mind is fundamental as we ask the hard questions about the product, market, and manufacturing.
| Technical Questions: How it works | Business Questions: How it creates profit |
|---|---|
| How big (or small) is it? | How do the sales and marketing work? |
| What kind of materials will be involved? | What is distribution like? |
| How does it work? | What’s the business model for the company? |
| What is the effect of a malfunction? | What are the projected sales volumes? |
| What are the features & benefits? | What is the market willing to pay for it? |
| What Regulatory Standards are involved? | How much will it cost to manufacture? |
| How much power does it consume? | How is it better than the competition? |
The Technical and Business questions are closely tied together and influence each other. High technical performance requirements cost more than less complex systems and low sales volumes make high-volume manufacturing techniques cost prohibitive. Once you start to form answers to these questions, you can estimate whether the margin between the lowest retail cost and the highest manufacturing cost makes the product viable. Once you’ve outlined these key questions along the Technical and Business spectrum, it’s time to really focus on your Product Requirements Specification. This is where you list all the different performance, functions, features, and everything that goes into your product and defines how the end user will use it. These all need to be objective and testable, so don’t include “looking pretty” (let your marketing people write that later). Now, it’s time to tackle things like functioning at 104℉, surviving a drop of 30 feet, or running 36 hours straight on battery.
Pro Tip: Divide the retail cost by 4 to 8 to get a maximum manufacturing budget, including overhead, R&D, distribution, service, warranty, and company growth.
Risky Business?
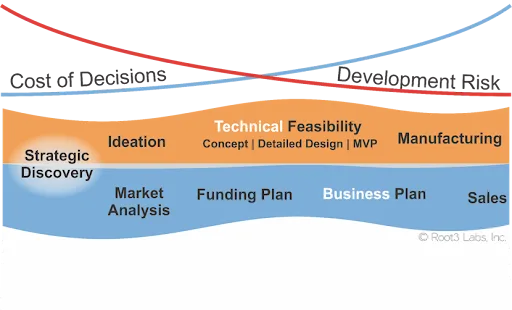
Risk. It’s a small word with big implications. In fact, the entire process of bringing a new product to market is, well… risky! We have technical risks of trying to meet high performance goals while meeting low cost targets. We have the safety risks of Class 2 or 3 medical devices. We have side effects. Efficacy studies. Risk of malfunction. And that’s just for the product. On the business side you have the risks of a changing marketplace, fickle consumers, competition that pops up while you’re in the middle of R&D, economic recession, regulatory risk with the FDA, medical device tax, or insurance reimbursement issues. That’s not to mention getting funding, budgets, and the unknown risk that you don’t even know about! Depressed yet? Just because there is risk doesn’t mean there aren’t things we can do to reduce it. At Root3 Labs, we use a risk model based on a cost of decisions vs development matrix (see chart). Essentially, we recommend attacking the riskiest components first so that we can get those out of the way before you venture down the path of more involved engineering time, performing tests, etc. Better to change it early on before it gets too expensive to change down the road.
Let’s Concept
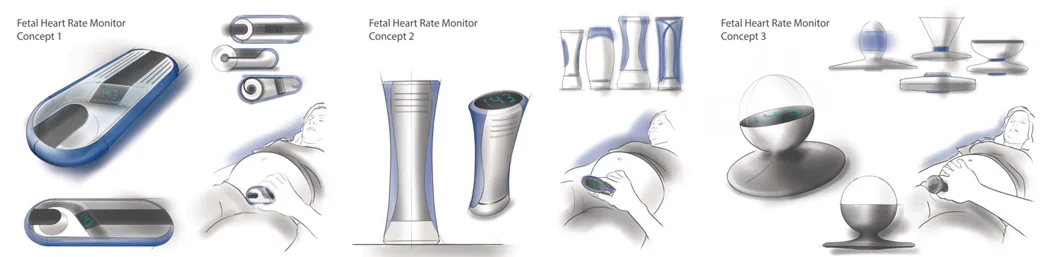
With this risk-based framework in mind, now is the time to start conveying the product idea and getting feedback from it. We want to understand what the best way forward is. This means sketches and CAD models and really understanding the use case scenarios. We can inexpensively start to visually bring to life answers to questions like:
- How will it be used?
- Who’s going to handle it?
- What does a use case look like from start to finish?
- Where does it live and what prompts its use?
With this feedback we can now filter out the concepts by weighing them against the criteria defined by the Product Requirements. By thinking through the various concepts, we can better understand the risk in context to the product– be it technology integration, sensing, price point, or something else.
Mock Ups
Building on this risk-informed concept phase, it’s time to move on to mock ups. Something tactile, that you can touch, hold, and handle just like the real product will feel. This exciting stage of the process is where we crank up the 3D printers or get out of the foam or clay- but we still want to keep our thinking simple and avoid very involved fabrication. Hey, even cardboard can work fine too at this point. With the learning from this phase, we then move on to building a benchtop prototype.
Bench Top Prototype
With a bench top prototype you want to look to the Product Requirements and figure out, “What are the real essential components for this product?” This means understanding how it works and what the technology looks like. We might use some off-the-shelf components to get started, maybe an Arduino with a motor, and figure out how it all works together. We’ll avoid custom parts at this stage so we know some aspects of the product will be limited, but it’s a way to evaluate the idea without going further down the road and spending cycles without this functional validation.
Software Mock Up
Of course, with anything using electronics we’re going to have some software needs along the way. Maybe it’s a mobile app that talks to your device over Bluetooth or integration with a PC or web app. Either way, the same philosophy applies to software as the product itself. You don’t need to go through the effort of building out all that functionality yet. It can take months to flesh out the software side so at this stage, focus on using screen mocks created in Photoshop or Canva. You can say, “Here are the 5 screens we’re going to use,” and then you can move elements and interface objects around without getting into a complicated code base. No app store, no dev, just focus on a set of screen mocks to help tell the story.
Works Like, Looks Like
If the trade-offs of an off-the-shelf prototype are too much, you can consider a works-like prototype in concert with a looks-like prototype. Works-like prototypes use off-the-shelf (and maybe a few custom parts) to show how the product will work, with limited functionality and little consideration to appearance. Looks-like prototypes have the form of the final product (or an intermediate step) but lack functionality. Think rapid prototype.
Pause. Set the Stage.
At this point in the process, it’s worth a reminder that what you’re holding in your hands is NOT the product. Building on all that you’ve developed, it’s time to present what you have in person, being fully prepared to show off everything the prototype can do as well as discuss all the ideas for what the device can be. Don’t ship it off. Don’t give the prototype away. It’s only a tool to help you communicate your vision and now is the time to tell that story.
Technical Feasibility into Design for Manufacture
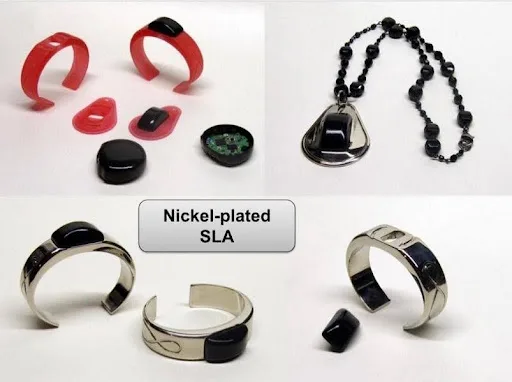
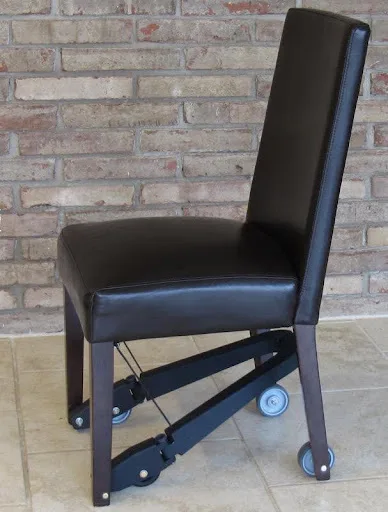
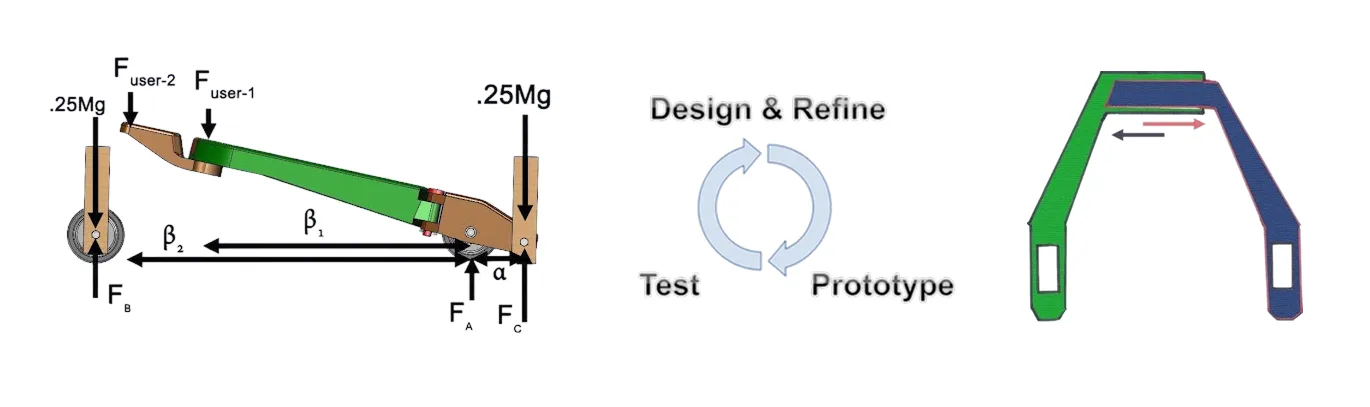
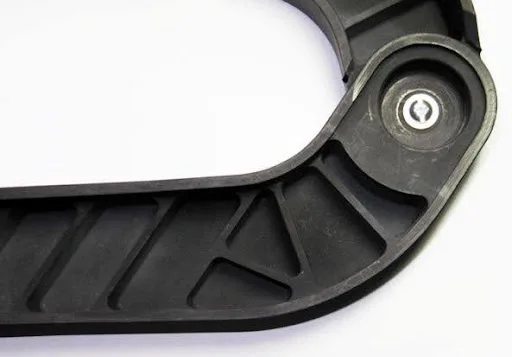
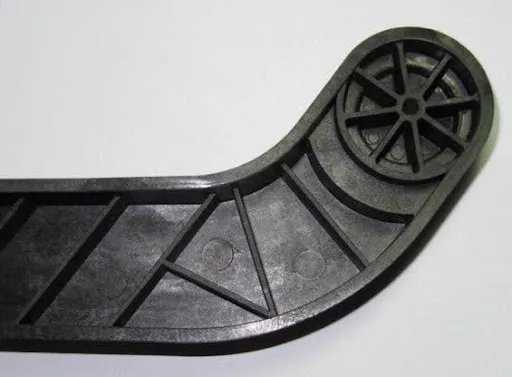
As the process moves toward the Design for Manufacturing stage, we’ll focus a good amount on testing. Can you see through it? Can you put weight on it? What amount of force should it handle? Where are the weak spots? Identifying these issues is the low-hanging fruit of the pre-manufacture phase and it’s all made possible by making (and breaking) 3D prototypes. Let’s take a look at how we used this process for one client before we went to manufacture.
Case Study: Milli Mova
Process is Power
Development of a regulated medical device requires another dimension of documentation, risk analysis, and validation. All aspects of the design must be verified and validated and traced back to the Product Requirements. Every design file and calculation must be checked, reviewed, approved, and added to an ISO-certified revision control system. Electrical devices will have to be tested against safety protocols such as IEC 60601 or 61010 and, the requirements for manufacturing and quality assurance are far more rigorous and expensive. In other words, bringing a new product to market is complex. .
Download the PDF Version of this Guide
Download our solution to help guide you through the labyrinth of product development. Our free guide: “Getting the Product Development Process Right,” goes deep into the intricacies of our approach.
This guide will help you empower yourself with the knowledge needed to embark on a successful development journey, ensuring that your ideas evolve from conceptualization to realization with precision and confidence.